
GAME PLAN
I’m going to start this off by saying that a very in-depth description of how to make this project can be found on the Instructables website here: https://www.instructables.com/id/Shattering-Wine-Glasses-With-Sound/
So, here’s a more general overview of the project. I started out with the idea that I wanted to be able to read in the resonant frequency of a wine glass, then reproduce that sound at a much higher volume to try and break the wine glasses. I originally thought that the production of the sound was going to be the tricky part, but I was wrong. It actually turned out to be the capturing of the sound that was the most difficult.
I started out with some research. I found many fewer articles describing how to break wine glasses with sound than I thought I would. There was one myth-busters episode showing someone breaking wine glasses with their voice, but they didn’t give any hard numbers as to how much power it would take to break. I was also able to find this article describing some students, but it was a little hard to parse. I eventually found that people were saying you needed two things to break glass. Firstly, you needed to hit the right resonant frequency within about 3-4 Hz, and secondly, you needed to produce anywhere from 110-145db of volume. I chose to shoot for around 130db as most people were in that range.


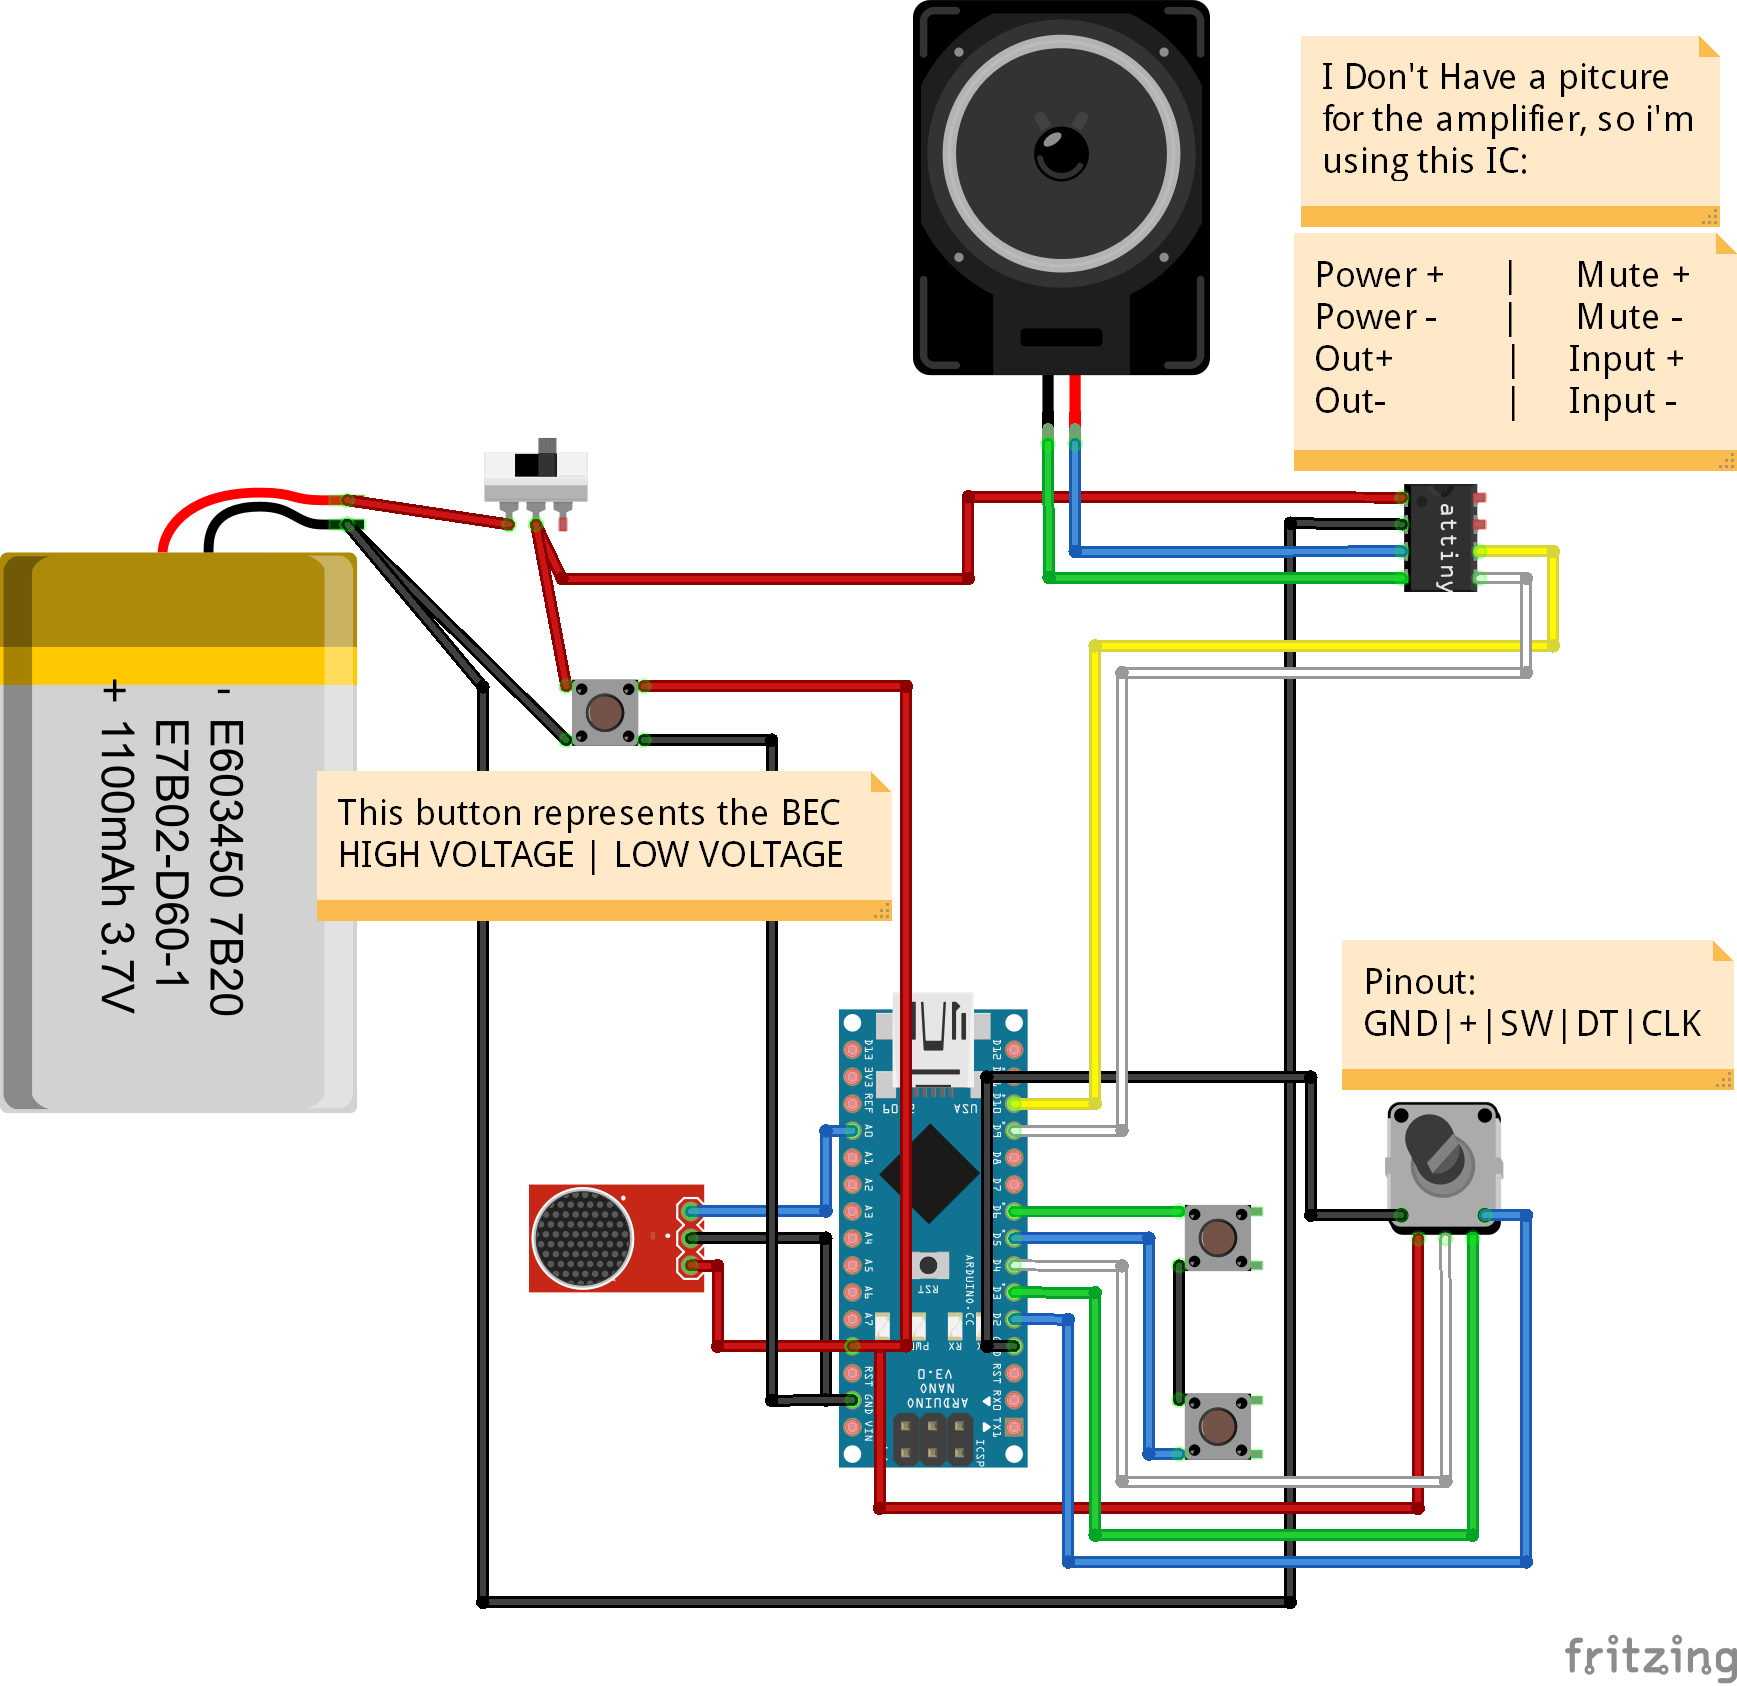
So once I came to a final decision and bought all the parts, and now it was time to start testing the circuit and stuff. I used Fritzing to make the circuit diagram and fairly quickly was able to wire everything together. I also found this ACtone Arduino library that allows you to double the source volume from the Arduino. It uses two pins to alternate the voltage between, allowing you to output a 5v swinging circuit.
I originally was planning on making a custom circuit with a little 6W transistor amplifier IC. However, that proved to not provide enough sound to actually break the glass. The speaker I chose should output 110db at 1W of power, but, through my experiments, that did not prove to be the case. I ended up with a small 60W amplifier board that output 130db from my experiments, and that worked well.
After some failures with the custom circuit, I bought the 60W amplifier and was actually able to break glass with it, which was amazing! The first time I was the glass crack I was ecstatic! The thing that I was mainly doing wrong was my placement of the speaker. It turns out that to break the wine glasses, it’s best to angle your speaker at the widest part of the glass. I originally thought that putting it to the rim of the glass would be best, but that just didn’t work as well.

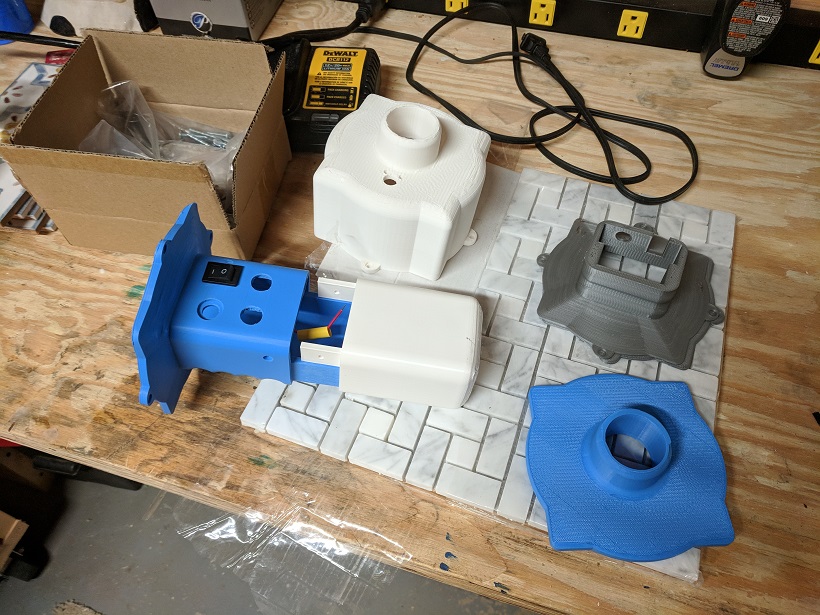
Now that I know I can actually break glass, it’s time to put it all into one neat and organize place. I modeled three parts to 3D print. My hope was that I would create something strong enough to hold all the heavy components together while still being fairly easy to take apart. I think I succeeded on that as well. There is one piece in the middle that holds all the electronics, a battery cover, and a part that holds the speaker and microphone in place.
Once all the parts were printed and I made sure that they worked and fit well (Took a couple of tries) I set about soldering all the things together. That took a long time to make sure that the wire lengths were all correct and that all the things were in the right place. I also burnt up two Arduino Nanos in the process, but I made it in the end. Once all the pieces were together and in place, it was time to tune the code to what I wanted.

The hardest part of this project by far was trying to get the correct frequency to output to the speaker. I thought I would just be able to find somewhere online that people were collecting the correct frequency from things into an Arduino, but that didn’t seem to be the case. Because I wanted to output one single frequency, I needed to be precise with my measurements.
What I ended up doing was writing the code to capture the ambient noise in the room to start off with. It would take in those frequencies for a while. Then you would record the glass being tapped. After you recorded that, it would compare each value in that recording with each value in the recording of the ambient room, and remove any that were the same. Once all the ambient values had been removed, I then run a loop to get whatever value appeared the most times in that new data set and that is the final value. That seemed to work the best out of any of the algorithms I came up with, and about 70% of the time would give you the correct value for the resonant frequency of the glass.
Once the code was done, all I had to do was take some videos, and put them on the instructables website. All that said and done, I really enjoyed doing this project and had a blast breaking glass!
NEWS:
http://engineering.kennesaw.edu/student-alumni-spotlight.php#tyler-gragg-shattering-audio